
How to Choose Bathroom Tiles: A Practical Guide
Author: MDC Tiles Date Posted:15 September 2026
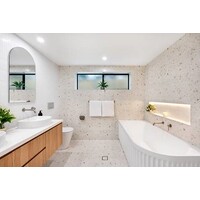

A practical guide to choosing bathroom tiles, including advice on suitability, size, colour, finish, grout, layout and ordering.
Choosing bathroom tiles is about more than finding a colour or style you love. The right combination needs to work with the size of the room, the way each surface will be used, the available light and the other finishes in the scheme.
This practical guide will help you compare bathroom wall and floor tiles, plan a balanced layout and make confident, lasting choices before you order.
Start with how the bathroom will be used
A family bathroom, compact ensuite and powder room each have different priorities. Begin by listing the surfaces that need tile and how much wear, water and cleaning each area will receive. Consider the main floor, shower floor and walls, vanity wall, bath surround, splashback and any niches or ledges.
Once the practical requirements are clear, decide where you want the eye to go. A calm bathroom may use one restrained tile across several surfaces. A more expressive scheme can combine a quieter main tile with one carefully chosen feature.
Choose tiles that suit each surface
A tile that is suitable for a wall is not automatically suitable for a floor, shower or other wet area. Check the individual product specifications for its intended application, finish and maintenance requirements before ordering.
Floor tiles need to be appropriate for foot traffic and the conditions of the specific area. Shower floors also need to work with the falls and drainage layout. Wall tiles offer more freedom in colour, shape and finish because they do not carry foot traffic.
Slip resistance, waterproofing, substrate preparation and installation requirements should be confirmed with your builder, designer, tiler or other qualified professional for the project.
Consider tile size and room proportions
Tile size changes how a bathroom feels. Larger formats can create a quieter surface with fewer grout lines, while smaller formats introduce detail and can follow curves, niches and shower-floor falls more easily.
Do not assume that a small bathroom must use small tiles. A larger tile can make a compact room feel more continuous when the layout is planned carefully. Equally, mosaic tiles can add scale, grip and visual interest in selected areas.
Before deciding, ask your tiler to assess the room dimensions, drainage points, niches and fixtures. A considered set-out can reduce awkward cuts and place grout lines in a more intentional relationship with the vanity, bath and shower screen.
Build a simple material palette
Most bathrooms feel more resolved when the palette is limited. Start with the main floor or wall tile, then add only the surfaces needed to support or contrast with it.
- Ceramic wall tiles offer colour, glaze and decorative possibilities for suitable wall applications.
- Porcelain tiles are available in many sizes and surface effects; always check the specific product’s application and finish.
- Natural stone brings individual variation and character but may require sealing and a more involved care routine.
- Mosaics and shaped tiles introduce pattern, texture and smaller-scale detail.
Explore ceramic wall tiles, subway tiles and square tiles to compare how different formats affect the room.
Use colour and finish with the light
Bathroom colours can change noticeably between showroom lighting, daylight and warm artificial light. Take samples into the room and view them beside cabinetry, benchtops, paint, tapware and any stone or timber finishes.
Lighter colours can help reflect available light, but they are not the only option for a compact space. Deep colour can feel considered and immersive when it is used deliberately. Warm whites, earthy neutrals and terrazzo-look tiles can add depth without relying on a strong contrast.
Gloss surfaces reflect more light and make colour appear lively. Matt and textured finishes create a softer look. The best choice depends on the surface, the desired maintenance routine and the product’s technical suitability.
Choose one clear feature
A bathroom often contains several visible surfaces in a relatively small area. If every surface competes for attention, the scheme can feel unsettled. Choose one focal point—such as the vanity wall, shower wall, niche or floor—and let the remaining tiles support it.
This is the MDC Feature Tile Effect: concentrating colour, pattern, shape or texture where it will have the greatest influence on the room. For more advice on creating visual hierarchy, read our Decorative Tile Buying Guide.
Treat grout as part of the design
Grout colour affects the finished surface. A close colour match creates a quieter, more continuous look, while contrasting grout emphasises each tile and the laying pattern. This difference is especially noticeable with mosaics, subway tiles and other small formats.
Compare grout samples with the actual tile before making the final choice. Also discuss joint width, movement joints, cleaning expectations and wet-area suitability with your tiler, as these details influence both appearance and performance.
Plan the layout before ordering
A dry layout or clear set-out plan helps identify where cuts will fall and how patterns will continue through corners, niches and adjoining surfaces. It is particularly important for tiles with strong variation, directional markings, repeating motifs or mixed faces.
Ask your tiler to calculate the required quantity, including the appropriate allowance for cuts, pattern matching, breakage and future repairs. The allowance will vary with the tile size, room shape and laying pattern, so it should be based on the actual project rather than a single standard percentage.
Bathroom tile planning checklist
- Confirm which tiles are suitable for each wall, floor and wet-area application.
- Review slip resistance and drainage requirements with a qualified professional.
- Compare samples under the bathroom’s natural and artificial light.
- Plan the tile set-out around fixtures, niches, corners and floor wastes.
- Choose grout colour and joint width as part of the design.
- Check whether the material requires sealing or specialist maintenance.
- Have the quantity and cutting allowance confirmed before ordering.
- Keep spare tiles from the same order for possible future repairs.
Bring the complete scheme together
Take your plans, measurements and samples of cabinetry, benchtops, paint and tapware when comparing tiles. Seeing the materials together makes it easier to judge undertones, scale and the balance between the main tile and any feature surface.
Visit our Miranda showroom and let the MDC tile and surface design specialists help you compare bathroom tiles, refine the palette and make confident choices for the complete room.